

Blender Studio 高级面部绑定实战:从零构建影视级角色表情系统Blender Studio - Advanced Facial Rigging
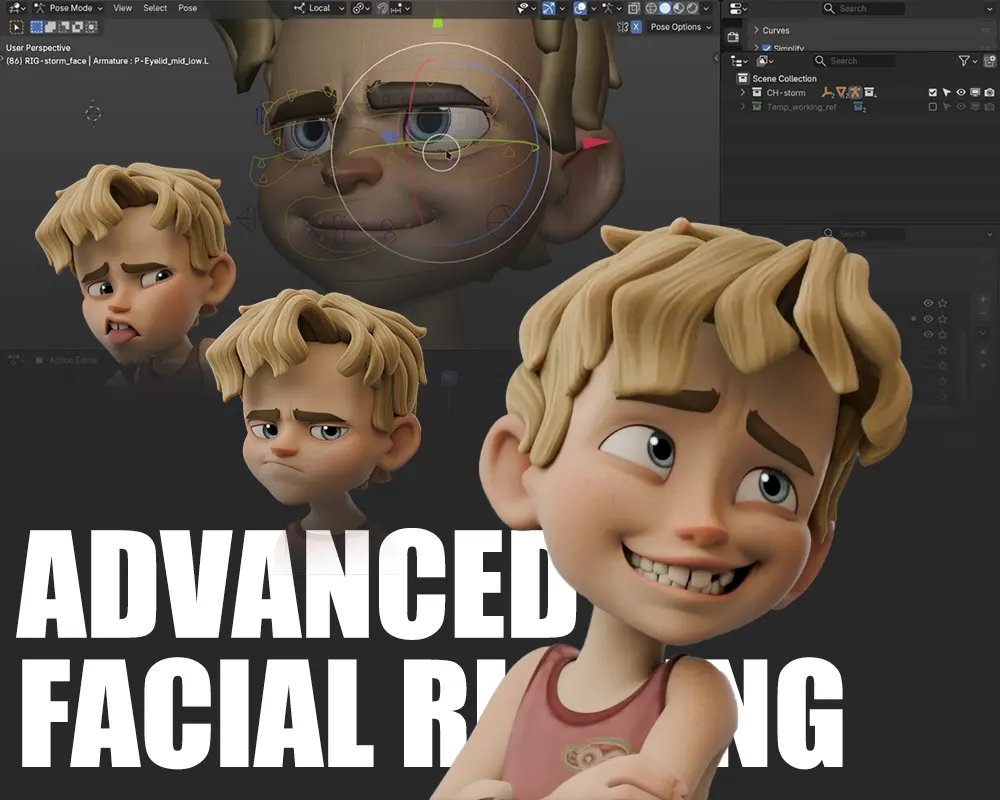
在现代三维动画制作流程中,角色面部绑定(Facial Rigging)始终是衡量一个绑定师技术水平的核心指标,也是决定角色表演张力与情感传达的关键所在。Blender Studio 最新推出的《Advanced Facial Rigging》课程,不仅仅是一套软件操作手册,更是一部深入剖析影视级角色“Storm”面部系统逻辑的理论与实战百科全书。本课程专门针对进阶用户设计,旨在填补从基础骨骼绑定到高精细度面部形变之间的技术鸿沟,通过近7个小时的深度教学,系统性地梳理了如何利用Blender 5.0的强大功能,打造出一套既稳定、高效又极具表现力的面部绑定方案。
面部绑定的核心难点在于如何在复杂的肌肉组织结构与动画师的易用性之间找到平衡。在传统的绑定流程中,很多初学者往往陷入“自动化插件”的依赖中,而忽略了底层形变逻辑。本课程的独特之处在于,它强调“从零构建”的教学理念。讲师Rik Schutte在课程中不仅传授了具体的点击路径,更深入讲解了变形理论(Deformation Theory)。在正式进入Blender操作之前,学员将深入理解面部骨骼布局的逻辑,掌握如何通过Ribbon Guide Mesh(丝带引导网格)来实现骨骼间的平滑插值,以及如何巧妙运用“三曲线原则”(Three Curve Principle)来构建嘴唇、眼睑等关键部位的运动轨迹。这种对底层逻辑的深挖,使得该课程不仅仅适用于Storm角色,更是一套可以被迁移到任何风格化角色上的通用方法论。
课程内容涵盖了从模型准备到最终控制部件设置的每一个细微环节。在第一章节中,讲师详细演示了如何进行模型清理、坐标轴对齐以及层级管理,这是所有高级绑定的基石。随后,课程进入了核心的骨骼布局阶段,从颈部、头部到下颚的逻辑连接,再到口周肌肉与鼻部骨骼的精确排布,每一步都体现了工业级的严谨性。特别是在“嘴唇”与“眼睑”这两个面部绑定最难处理的区域,课程引入了丝带网格(Ribbon Mesh)与变形骨骼(Deformation Bones)的深度结合方案。通过创建辅助空物体(Helper Empties)与约束设置,学员可以学习到如何实现嘴唇的自动跟随与平滑闭合,这种技术能够极大减少动画师在后期调整表情时的繁琐工作量。
除了骨骼驱动,本课程还对Shape Keys(形态键)的使用进行了极其细致的讲解。在眉毛、脸颊以及嘴角区域的塑造中,课程展示了如何通过混合骨骼驱动与形态键来达到极致的形变效果。这种“混合驱动”的思路是影视级绑定的标配,它既能保留骨骼运动的灵活性,又能通过形态键修正复杂的肌肉折叠与挤压。特别是在处理“嘴角组合形态键”时,课程深入探讨了如何处理不同表情叠加时的权重冲突,以及如何通过矫正性形态键(Corrective Shape Keys)来优化张嘴时的口腔内部结构。这种对于细节的极致追求,正是Blender Studio出品课程一贯的行业高标准。
本课程不仅适合专业的绑定师,对于那些希望深入了解角色表演底层机制的动画师来说,同样是一份不可多得的进阶资源。通过剖析Storm角色的绑定结构,动画师可以更清晰地理解骨骼运动的限制条件,从而在表演时做出更具说服力的表情决策。课程中提到的“Three Curve Principle”不仅是一项技术,更是一种美学原则,它要求我们在绑定时时刻关注形变线条的连贯性,从而避免角色在运动过程中出现破损或不自然的塌陷。此外,课程还详细介绍了控制部件(Control Widgets)的设置与覆盖变换(Override Transforms)的技巧,这些工具的加入,让整个面部绑定系统不仅是一个功能强大的引擎,更是一个界面友好、反馈直观的交互平台。
值得一提的是,本课程完全基于Blender 5.0版本进行开发,这意味着学员将接触到目前Blender生态中最前沿的绑定工具与工作流优化。随着Blender在影视行业的应用愈发广泛,掌握这种标准化的、可扩展的面部绑定流程,将成为每一位角色艺术家在职场竞争中的核心筹码。课程附带的完整工程文件、脚本以及插件,为学员提供了一个完整的实验环境。你可以直接打开工程文件,查看讲师是如何通过复杂的约束逻辑将数以百计的骨骼与网格连接在一起的。这种“解剖式”的学习方式,能够让你在最短的时间内掌握高级绑定的精髓。
总之,这不仅仅是一次技术升级,更是一场关于角色灵魂塑造的深度修行。无论你是想要提升作品集质量的自由职业者,还是希望在工作室中引入更高效绑定工作流的技术总监,这套《Advanced Facial Rigging》教程都将为你提供从理论支撑到实战落地的完整解决方案。通过学习本课程,你将学会如何像行业顶级专家一样思考,如何利用Blender的原生工具解决复杂的解剖形变难题,并最终构建出属于你自己的、具备电影质感的角色面部绑定系统。现在就加入这趟探索之旅,让你的角色在屏幕上真正“活”起来。
教程说明:
格 式:MP4
工 程:包含工程文件
所用软件:Blender 5.0
分 辨 率:高清1920×1080
时 长:6小时53分钟
语言字幕:英语发音/英文字幕
大 小:5.51GB
Advanced Facial Rigging
In this course, we are going to cover every method and workflow used to create the fexlible and expressive facial rigging system for Storm, the latest character by Blender Studio.
11 Chapters
55 Videos
6h 53m
Videos Duration
Are you ready to learn facial rigging? Then you're in the right place! Rik Schutte has been working on this advanced course, spending months preparing, writing, and recording every step of the process.
In order to use the latest functionality, Blender 5.0 or later is required to complete the course successfully.
Here is a showcase of the Storm character, which was rigged using the same techniques shared in this course.
What is the course about?
This is a video course that goes over the step-by-step process of how to create a high-quality facial rig in Blender. We'll be using different techniques for facial deformation as well as Blender's native tools and free add-ons to accommodate this particular workflow. The course contains over 40 videos and additional files, scripts, and add-ons to provide you with everything you need to follow along.
Note that this is an advanced rigging course that assumes you already have a solid understanding of facial rigging and Blender in general.
Facial rigging can be a daunting and tedious task. With this course, I hope to make it a straightforward process that is standardized and can serve as a base for a variety of characters and styles.
Deformation theory will be explained before diving into Blender.
Deformation theory will be explained before diving into Blender.
This course is not about rigging automation, as we make almost everything from scratch. In order to thoroughly understand the workflow, we need to follow each step and grasp the underlying concepts.
Advanced training
This course assumes you know how to navigate Blender and are familiar with constraints, bone assignments, and rigging in general.
If you are familiar with rigging and want to expand your knowledge of facial rigging, this course is right up your alley. Even if you are an animator who wants to peek under the hood, this course offers an interesting look at the decisions made to accommodate certain features for animators.
Bone setup created for eyelid deformation.
Bone setup created for eyelid deformation.
References
The workflows and techniques used for Storm are inspired by facial rigs commonly seen in the animation industry. I wanted to create a facial rigging workflow that allows us to produce dynamic and appealing animations with characters capable of a wide range of expressions. The knowledge I have gained over the years comes from my experience as an animator working with high-end, film-quality character rigs, as well as from following facial rigging courses.
I have also spoken with several riggers and animators in the animation industry to learn about their thoughts and principles for creating and using effective facial rigs. Many of the facial rigging principles and deformation concepts are explained thoroughly in the book The Art of Moving Points by Brian Tindall.
Ribbon Guides and Shape Keys
One method I used is the creation of Ribbon Guide Meshes to achieve smooth and predictable interpolation between neighboring bones while following the "three curve principle" as explained in the book.
Another method involves creating a series of shape keys to accommodate the deformation of the brows and cheeks. This method applies the same "three curve principle" but in a more traditional way.
Even though I implemented the brows this way on Storm, I would likely introduce the Ribbon Guide Mesh workflow for the brows as well in future versions to give the animator more flexibility. Either way, I think it's useful to explain and demonstrate both workflows in the course, since they are universally applicable and conceptually equally strong.
Manipulating lip deformation by creating a ribbon guide mesh.
Manipulating lip deformation by creating a ribbon guide mesh.
An animator's perspective
As Storm was the first facial rig I shipped, I learned a great deal during the creation of its initial version. While writing this course and dissecting Storm's facial rig, I updated some of the naming conventions and made small adjustments to the bones, among other improvements.
This means the course reflects a slightly updated version of the facial rig setup compared to the original Storm release. The naming is cleaner and certain aspects of the rig have been optimized. That said, there are no noticeable changes for the animator.
Constraint setup for the mouth, lips, and jaw.
Constraint setup for the mouth, lips, and jaw.
If you are following the course, please let me know if anything is unclear by leaving a comment. We will read all comments and suggestions and update the course if necessary. I wish you the best of luck on your rigging journey, and I hope this course provides you with the tools and knowledge to create fantastic character rigs in Blender.
教程目录:
1. Model Preparation
1 - summary-1080p.mp4
4 - aligning-to-world-orientation-1080p.mp4
2 - separating-objects-1080p.mp4
3 - scale-symmetry-and-resolution-1080p.mp4
5 - modeling-adjustments-1080p.mp4
6 - manage_outliner.mp4
2. Initial Bones
1 - neck-and-head-1080p.mp4
2 - jaw-1080p.mp4
3 - mouth-1080p.mp4
4 - extra-bones-1080p.mp4
5 - nose-1080p.mp4
3. Lips
1 - intro_3curve_principle-1080p.mp4
2 - ribbon-mesh-1080p.mp4
3 - helper_empties.mp4
4 - stretch-bones-1080p.mp4
5 - deformation-bones-1080p.mp4
6 - constraints-1080p.mp4
7 - Lips_local_bones.mp4
8 - weight-painting-1080p.mp4
9 - lip-zipper-1080p.mp4
4. Eyes
1 - initial-bones-1080p.mp4
2 - eye-highlights-1080p.mp4
3 - iris-and-pupil-1080p.mp4
4 - initial-weight-painting-1080p.mp4
5 - eyelids-ribbon-mesh-1080p.mp4
6 - eyelids-deformation-bones-1080p.mp4
7 - eyelids-local-controls-1080p.mp4
8 - eyelids-weight-painting-1080p.mp4
9 - auto-blink-1080p.mp4
10 -eyelids-follow-1080p.mp4
5. Brows
1 why-shape-keys-1080p.mp4
2 deformation-and-eye-sockets-1080p.mp4
3 temporary-geometry-1080p.mp4
4 creating-x-and-z-directions-1080p.mp4
5 creating-shape-keys-1080p.mp4
6 applying-shape-keys-1080p.mp4
7 brows_splitting_weights_theory.mp4
8 local-controls-1080p.mp4
6. Cheeks
1 main-shape-keys-1080p.mp4
2 lattice-deformers-1080p.mp4
3 splitting-weights-1080p.mp4
7. Teeth and Tongue
1 teeth-1080p.mp4
2 tongue-1080p.mp4
8. Mouth Corner Shapekeys
1 mouthcorners_shapekeys_concept-1080p.mp4
2 initial-shape-keys-1080p.mp4
3 combination-shape-keys-1080p.mp4
4 mouth-open-corrective-shape-keys-1080p.mp4
5 mouth-squash-1080p.mp4
9. Additional Deformers
1 cheek-puff-1080p.mp4
2 additional-lattices-1080p.mp4
3 lip-pucker-1080p.mp4
4 lip-compress-1080p.mp4
5 nostril-shape-keys-1080p.mp4
10. Control Widgets
widgets-and-override-transforms-1080p.mp4
-
 插件脚本/骨骼绑定 2026-08-14
Pose to Rest Pose插件下载|Blender姿态转静息姿态插件|Blender形态键保持插件|一键应用姿态为静息姿态|Blender骨骼绑定工具
在Blender三维角色动画工作流中,将当前姿态固化为新的静息姿态(Rest Pose)是一项常见但操作繁琐的需求。无论是为游戏引擎导出优化后的基础姿态、重新定义角色绑定的中性位置,还是为后续动画制作建立更合理的起始基准,传统方法都面临一个棘手的矛盾:直接使用Blender内置的“Apply Pose as Rest Pose”功能虽然能快速完成姿态转换,却会不可避免地破坏或丢失网格对象上精心设置的形态键(Shape Key)数据以及关联的驱动器(Driver)系统。对于依赖...
-
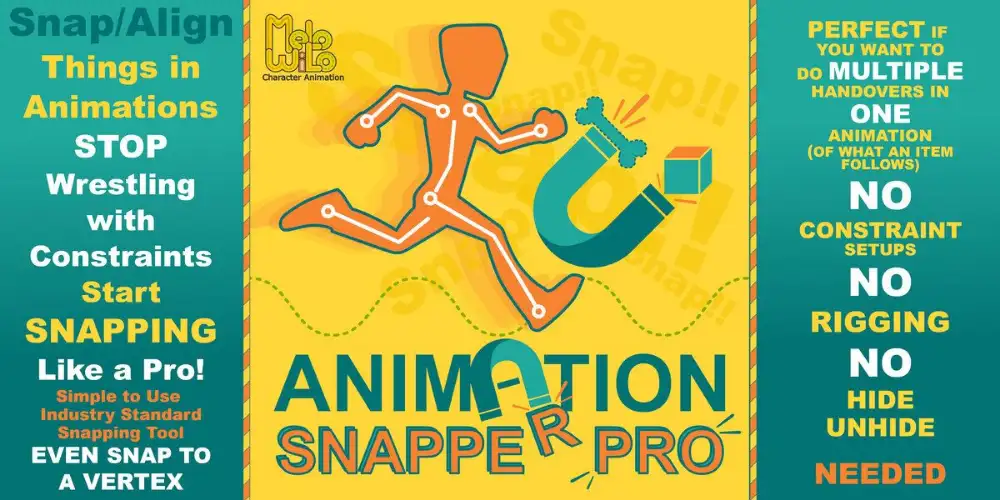
在3D动画创作中,约束系统一直是实现物体间跟随关系的核心手段,但传统约束工作流往往伴随着难以管理的复杂层级、繁琐的影响值关键帧调整,以及在团队协作中令人头疼的“意大利面条式”节点网络。当您需要让一个物体在不同时间点切换跟随不同的目标,或者需要反复调整动画细节时,约束系统很快就会演变成一场噩梦。Animation Snapper Pro正是为解决这一长期痛点而生的革命性Blender插件。它彻底摒弃了在动画物体上创建额外约束或复杂父子级联的传统思路,将所有捕捉和跟随逻辑直接转化...
-
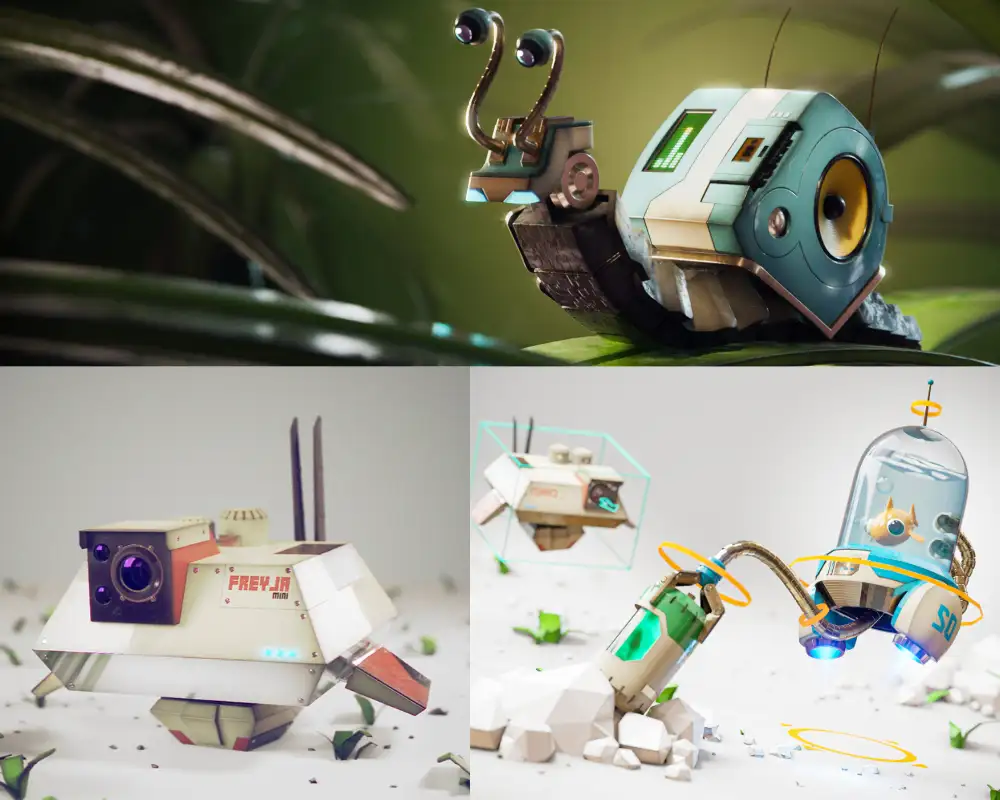
如果你正在寻找一套能够系统学习 Blender机器人硬表面建模、材质贴图、绑定动画、场景搭建与渲染输出 的完整课程,那么这套由 Louis du Mont 主讲的 CGBoost《Robotic Planet》 无疑是非常值得关注的一套精品教程。课程围绕“机器人制作”这一极具表现力和商业潜力的主题展开,从最初的创意构思,到具体的模型搭建,再到材质节点制作、骨骼绑定、动画设计、灯光渲染以及最终成片输出,形成了一个非常完整的 Blender 学习闭环。和很多只讲单一模块的教程不同...
-
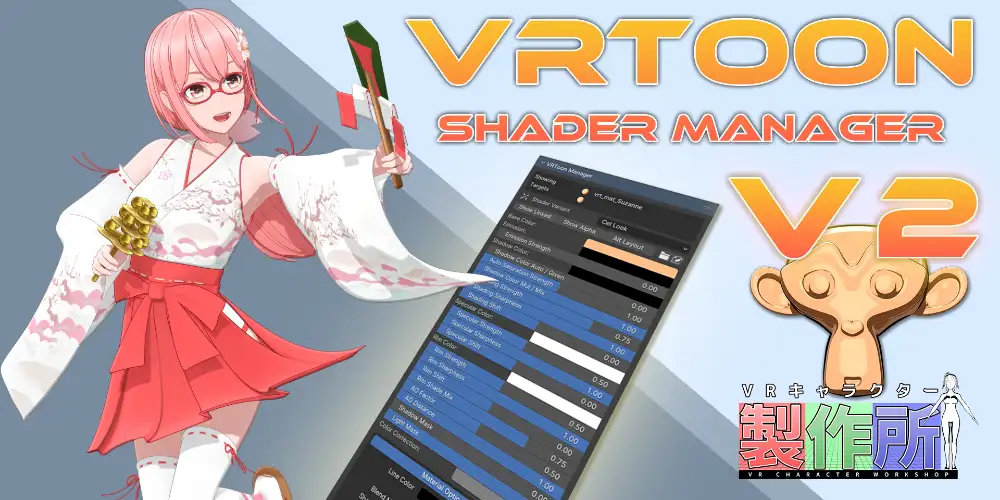
Vrtoon Shader Manager V2.3.7 是一款专门面向 Blender Eevee 渲染器打造的 NPR 非真实感卡通着色器管理插件,主要用于快速制作动漫角色、二次元人物、卡通场景、游戏模型以及风格化产品展示效果。与需要手动搭建大量材质节点的传统流程相比,Vrtoon Shader Manager V2 将复杂的卡通明暗分层、边缘光、镜面高光、法线细节、描边和材质参数集中到统一的管理界面中,让用户无需反复进入每一个材质节点树,也能高效完成整套模型的着色调整。...